Read, show, and save imgs
Contents
1. Read, show, and save imgs
import cv2

import numpy as np
from PIL import Image

from tensorflow.keras.preprocessing.image import load_img, img_to_array, array_to_img

import matplotlib.pyplot as plt
1.1. read & show
1.1.1. 彩色圖片
常見的讀檔套件比較
package |
read function |
show function |
save function |
type |
channel |
dimension (color img) |
dimension (gray img) |
value range |
value type |
|---|---|---|---|---|---|---|---|---|---|
plt |
import matplotlib.pyplot as plt |
plt.show(img_array) |
plt.imsave(‘xx.png’, img_array) |
ndarray |
R, G, B |
(height, width, channel) |
(height, width) |
[0-255] |
uint8 |
PIL |
import np |
img |
img_obj.save(“xx.jpeg”) |
|
R, G, B |
(height, width, channel) |
(height, width, channel) |
[0-255] |
uint8 |
tf.keras |
from tensorflow.keras.preprocessing.image import |
img |
img_obj.save(“xx.jpeg”) |
|
R, G, B |
(height, width, channel) |
(height, width, channel) |
[0.-255.] |
float32 |
cv2 |
import cv2 |
plt.imshow(img_array) |
cv2.imwrite(‘xx.png’, img_array) |
ndarray |
B, G, R |
(height, width, channel) |
(height, width, channel) |
[0-255] |
uint8 |
可以看到 3 個重點:
channel 的順序,只有 CV2 是 BGR, 其他全都是 RGB
value range: 只有 pytorch 讀進來會轉換成多少,其他全都是 0~255
value type 只有 tf.keras 轉完是 float32, 其他都是 uint8
1.1.1.1. plt.imread
import matplotlib.pyplot as plt
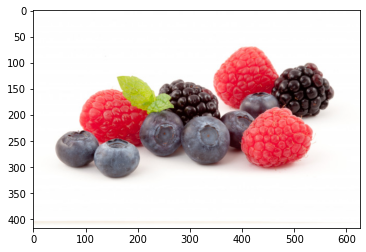
plt_img = plt.imread("imgs/fruits-2.jpg")
print(f"read image type: {type(plt_img)}")
print(f"read image data type: {plt_img.dtype}")
print(f"read image data shape: {plt_img.shape}")
read image type: <class 'numpy.ndarray'>
read image data type: uint8
read image data shape: (417, 626, 3)
來看一下圖片長怎樣
plt.imshow(plt_img);

1.1.1.2. PIL, tf.keras
import numpy as np
from PIL import Image
pil_img = Image.open("imgs/fruits-2.jpg")
print(f"read image type: {type(pil_img)}")
read image type: <class 'PIL.JpegImagePlugin.JpegImageFile'>
pil_img_array = np.asarray(pil_img)
print(f"read image type: {type(pil_img_array)}")
print(f"read image data type: {pil_img_array.dtype}")
print(f"read image data shape: {pil_img_array.shape}")
read image type: <class 'numpy.ndarray'>
read image data type: uint8
read image data shape: (417, 626, 3)
keras 是直接沿用 PIL,所以結果都和剛剛一樣:
keras_img = load_img("imgs/fruits-2.jpg")
print(f"read image type: {type(keras_img)}")
read image type: <class 'PIL.JpegImagePlugin.JpegImageFile'>
keras_img_array = img_to_array(keras_img)
print(f"read image type: {type(keras_img_array)}")
print(f"read image data type: {keras_img_array.dtype}")
print(f"read image data shape: {keras_img_array.shape}")
read image type: <class 'numpy.ndarray'>
read image data type: float32
read image data shape: (417, 626, 3)
可以看到,keras 的 data type 是 float32
驗證一下,兩個套件讀出來的 numpy array 完全一樣 (注意: integer 255, 和 float 255.0,比較時會視為一樣):
(keras_img_array == pil_img_array).all()
True
看一下圖
plt.imshow(keras_img_array.astype("uint8"))
<matplotlib.image.AxesImage at 0x159f9ff10>

1.1.1.3. cv2
cv2_img = cv2.imread("imgs/fruits-2.jpg")
print(f"read image type: {type(cv2_img)}")
print(f"read image data type: {cv2_img.dtype}")
print(f"read image data shape: {cv2_img.shape}")
read image type: <class 'numpy.ndarray'>
read image data type: uint8
read image data shape: (417, 626, 3)
可以看到,shape 和剛剛一樣
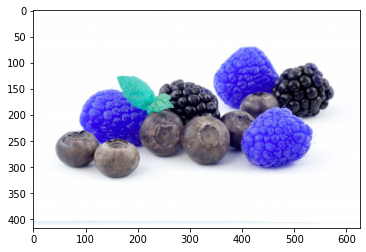
但他的第三個軸,是 GBR,不是 RGB,所以一樣用
plt.imshow()來畫圖時,可以看出差異
plt.imshow(cv2_img);

原本的紅色,都變藍色了,就是因為 R 和 B 的 channel 調換了,而
plt.imshow()是以為你輸入的影像是 RGB如果要用
plt.imshow()來顯示正確顏色的話,就要把原本的 array 的通道做調整,例如這樣
plt.imshow(cv2_img[:,:,::-1]); # 對通道那個軸,取最後到最前 (::-1),就把 BGR 變成 RGB 了
或是,你要用 cv2 裡的 function 也可以
img_rgb = cv2.cvtColor(cv2_img, cv2.COLOR_BGR2RGB)
plt.imshow(img_rgb);

那,最後一種做法,是直接用 cv2 的 function 來 show 圖,他就會知道你的影像是 BGR,就會顯是正確
cv2.imshow("window_name", cv2_img)
cv2.waitKey(0)
cv2.destroyAllWindows()
1.1.2. 灰階圖片
原始的灰階圖片,不會有 channel,所以讀進來應該是 (1024, 1024) 這種 shape
但是!!!!!
只有
plt.imread(),讀進來會是 (1024, 1024)其他像
cv2.imread(), 或是 PIL 的Image.open(), 或是 keras 的load_img(),讀進來都會是 (1024, 1024, 3) 這種 shape,然後 3 個 channel 值都一樣
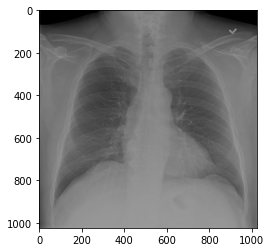
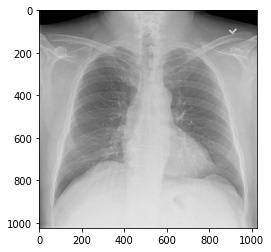
plt_img = plt.imread("imgs/chest_xray_image.png")
print(f"Image shape is: {plt_img.shape}")
Image shape is: (1024, 1024)
plt.imshow(plt_img, cmap = "gray");

cv2_img = cv2.imread("imgs/chest_xray_image.png")
print(f"Image shape is: {cv2_img.shape}")
Image shape is: (1024, 1024, 3)
然後,三個通道的值都一樣
print((cv2_img[:,:,0] == cv2_img[:,:,1]).all())
print((cv2_img[:,:,0] == cv2_img[:,:,2]).all())
print((cv2_img[:,:,1] == cv2_img[:,:,2]).all())
True
True
True
畫圖時,三個通道的值都相同,混出來就變灰階的顏色
plt.imshow(cv2_img);
不相信的話,你三個通道都寫 0 ,會幫你混出全黑的圖
plt.imshow(np.zeros((1024,1024,3)));
PIL 和 keras,也是和 cv2 一樣,都是同樣的值,複製三次給三個通道
keras_img = img_to_array(load_img("imgs/chest_xray_image.png"))
print(f"Image shape is {keras_img.shape}")
Image shape is (1024, 1024, 3)
plt.imshow(keras_img.astype("uint8"));

1.2. save
1.2.1. 存彩色圖片
將 np.array 存成 圖片:
如果你的 np.array 的 channel 是 RGB,請用
plt.imsave()來存,因為 plt當初在讀的時候,就預設讀進來後轉成 RGB 的 array如果你的 np.array 的 channel 是 BGR,請用
cv2.imwrite()來存。因為 cv2 當初在讀檔時,就預設讀進來後轉成 BGR 的 array
將 np.array 先轉成 PIL 物件,再存成圖片
PIL 或 keras,他們本身就有 PIL 物件可用,那就用該物件的
.save()method 來存。所以,就要把 np.array 先轉回 PIL 物件,再存
1.2.1.1. np.array 存檔,用 cv2.imread(),但要注意 channel
如果我用
plt.imread()來讀檔,那 array 的 channel 會是 RGB
plt_img = plt.imread("imgs/fruits-2.jpg")
plt.imshow(plt_img);

此時,如果我用
cv2.imwrite()來存檔,他會把你的 array 當 BGR 來存
cv2.imwrite("imgs/temp.jpg", plt_img)
True
所以,讀檔後,就會發現他剛剛存出去存錯了
plt_img = plt.imread("imgs/temp.jpg")
plt.imshow(plt_img);
那,一種做法,是把這個影像轉成 BGR,再存
plt_img = plt.imread("imgs/fruits-2.jpg")
plt.imshow(plt_img);

cv2.imwrite("imgs/temp.jpg", plt_img[:,:,::-1])
True
plt_img = plt.imread("imgs/temp.jpg")
plt.imshow(plt_img);

另一種作法,是用
matplotlib.image.imsave來存,那就會預設你是給他 RGB
plt_img = plt.imread("imgs/fruits-2.jpg")
plt.imshow(plt_img);

import matplotlib
matplotlib.image.imsave('imgs/temp.jpg', plt_img)
plt_img = plt.imread("imgs/temp.jpg")
plt.imshow(plt_img);

1.2.1.2. 轉回 PIL 物件,再存檔
那對於 np.array 的資料,我們都可以轉回 PIL 物件
plt_img = plt.imread("imgs/temp.jpg")

import PIL
img_obj = PIL.Image.fromarray(plt_img)
type(img_obj)
PIL.Image.Image
接著,用
.save()method 來存檔
img_obj.save("imgs/temp.jpg")
讀檔後就可發現是對的了
plt_img = plt.imread("imgs/temp.jpg")
plt.imshow(plt_img)
<matplotlib.image.AxesImage at 0x15a23ed30>

那因為 keras 的底層就是 PIL,所以做法也是一樣的
img_obj = array_to_img(plt_img)
img_obj.save("imgs/temp.jpg")
一樣讀檔後,就可載入
plt_img = plt.imread("imgs/temp.jpg")
plt.imshow(plt_img);

1.2.2. 存灰階圖片
如果原本的圖片,是只有 (height, width),而沒有 channel 的 numpy array,那用
plt_img = plt.imread("imgs/chest_xray_image.png")
print(f"Image shape is: {plt_img.shape}")
Image shape is: (1024, 1024)
plt.imshow(plt_img, cmap = "gray");

cv2.imwrite("imgs/temp.jpg", plt_img)
True
plt_img = plt.imread("imgs/temp.jpg")
print(f"Image shape is: {plt_img.shape}")
Image shape is: (1024, 1024)
plt.imshow(plt_img, cmap = "gray")
<matplotlib.image.AxesImage at 0x14d669700>
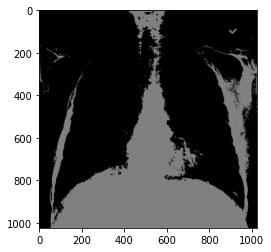
set(plt_img.flatten())
{0, 1, 2}
import matplotlib
matplotlib.image.imsave("imgs/temp.jpg", plt_img)
plt_img = plt.imread("imgs/temp.jpg")
print(f"Image shape is: {plt_img.shape}")
Image shape is: (1024, 1024, 3)
plt.imshow(plt_img)
<matplotlib.image.AxesImage at 0x14f389760>
(plt_img[:,:,0] == plt_img[:,:,1]).all()
True
plt.imsave('imgs/temp.jpg', plt_img)
plt.imsave('imgs/temp.jpg', plt_img, cmap='gray')